Let’s be real for a moment. That golden, crispy perfection you pull out of your deep fryer? It comes at a price. And I’m not talking about calories. I’m talking about the inevitable, greasy, caked-on gunk that builds up on the heating element. It’s the unsung hero of your fryer, but over time, it can look pretty villainous. If you’re wondering how to clean a deep fryer heating element effectively, you’ve come to the right place. I remember the first time I peeked inside my fryer after a few months of heavy use and saw that dark, sticky residue. My first thought wasn’t “yum,” it was “uh-oh.” But don’t worry, restoring that element to its gleaming glory isn’t just possible; it’s essential for better-tasting food and a longer-lasting machine.
Why a Clean Heating Element is Your Fryer’s Best Friend
You might be tempted to just close the lid and forget about it. Out of sight, out of mind, right? Not quite. A dirty heating element is more than just an eyesore; it’s a performance killer.
Think of it like this: the caked-on grime acts as an insulator. It forces the element to work harder to heat the oil to the right temperature. This leads to a few problems:
- Inefficient Heating: Your fryer consumes more electricity to get the job done, which can sneak up on your utility bill.
- Inconsistent Temperatures: Hot spots and cold spots can develop, leading to unevenly cooked food. Nobody wants one soggy onion ring and one burnt one in the same batch.
- Tainted Flavors: That old, burnt-on gunk is essentially old, burnt-on food particles and polymerized oil. Those “off” flavors can leach back into your fresh oil, making your delicious french fries taste faintly of last month’s fish fry.
- Reduced Lifespan: Forcing any appliance to work harder than it’s designed to will inevitably shorten its life. Regular cleaning is the cheapest insurance policy you can get for your kitchen gear.
Safety First: Pre-Cleaning Checklist
Before we dive into the suds and scrubbing, let’s cover the non-negotiables. Electricity, hot oil, and water are a trio you don’t want to mess with. Safety is paramount.
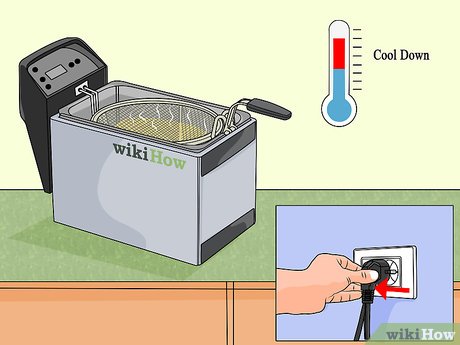
- [ ] Unplug the Unit: This is the most important step. Don’t just turn it off; physically unplug the deep fryer from the wall outlet.
- [ ] Let It Cool Completely: Never, ever attempt to clean a deep fryer that is still warm. The oil and the metal components can cause severe burns. Give it at least a couple of hours.
- [ ] Work in a Well-Ventilated Area: Some cleaning agents, even simple ones like vinegar, can create fumes. Open a window or turn on your kitchen’s exhaust fan.
- [ ] Read Your Manual: Your manufacturer’s guide is your best friend. It may have specific warnings or recommendations for your model, especially regarding removable vs. fixed heating elements.
How to Clean Deep Fryer Heating Element: A Step-by-Step Guide
Alright, with the safety briefing out of the way, it’s time to roll up our sleeves. We’re going to banish that grime for good.
Step 1: Gather Your Cleaning Arsenal
You don’t need fancy, expensive chemicals. Most of what you need is probably already in your kitchen.
- A large container or bucket for the old oil
- A fine-mesh sieve and cheesecloth or coffee filters (for filtering oil if you plan to reuse it)
- A non-abrasive sponge or soft-bristled brush (an old toothbrush is perfect for nooks and crannies)
- Paper towels or a soft cloth
- Mild dish soap (like Dawn)
- Baking soda
- White vinegar (optional, but great for tough jobs)
Step 2: Drain and Deal with the Oil
First things first, the oil has to go. Carefully pour the cooled oil out of the fryer reservoir. If the oil is relatively new and you want to reuse it, pour it through the fine-mesh sieve lined with cheesecloth into a clean, airtight container. This is a great time to check out our guide on choosing the best oil for deep frying to maximize flavor and longevity. If the oil is dark, smells rancid, or has a lot of floating debris, it’s time to dispose of it properly.
Pro Tip: Never pour old cooking oil down the drain! It can cause massive plumbing blockages. Pour it into a sealable, non-recyclable container (like an old milk jug) and throw it in the trash, or check with your local waste management service for recycling options.
Step 3: The Initial Takedown (The Dry Scrub)
With the oil gone, you can see your enemy clearly. Remove the fryer basket and any other removable parts. Use a paper towel or a plastic scraper to gently wipe away any large, loose pieces of debris from the heating element and the reservoir. The goal here is just to get the low-hanging fruit before the deep clean.
Step 4: The Soaking Method for Fixed Elements
Most modern home deep fryers have a fixed, immersed heating element. The key here is to clean it without getting the electrical housing wet.
- Fill the Reservoir: Fill the fryer basin with warm water, making sure the water level is high enough to completely submerge the dirty part of the heating element. Crucially, do not let the water touch the electrical connection box where the element enters the fryer body.
- Add Your Cleaner: Add a generous squirt of dish soap and about a quarter-cup of baking soda to the water. Swish it around a bit to dissolve.
- Let It Soak: Let the solution sit for at least 30 minutes to an hour. This gives the soap and baking soda time to work their magic, breaking down the tough, polymerized grease.
- Gentle Scrubbing: After soaking, take your soft-bristled brush or sponge and gently scrub the heating element. The grime should come off much more easily now. Pay special attention to the areas where the element coils or bends, as that’s where gunk loves to hide.
- Rinse and Dry: Carefully drain the soapy water. Refill with clean water to rinse, again avoiding the electrical components. Drain again. Now, use paper towels or a soft cloth to thoroughly dry the element and the entire interior. This is a critical step to prevent rust. Let it air dry for another hour just to be safe.
What about Removable Heating Elements?
If you’re lucky enough to have a deep fryer with a removable heating element, the process is even easier. You can soak the element in your sink with hot water, dish soap, and baking soda. This allows you to scrub it from all angles without worrying about getting the main unit wet. Just be sure to never submerge the electrical plug/control panel portion in water.
What NOT to Do When Cleaning Your Heating Element
Knowing what to avoid is just as important as knowing what to do. Here are a few common mistakes that can damage your deep fryer:
- Never Use Steel Wool or Abrasive Scourers: These will scratch the surface of the heating element, creating tiny crevices where more gunk can build up in the future.
- Avoid Harsh Chemicals: Oven cleaners and other caustic chemicals can be too aggressive and may damage the element’s coating or leave behind a residue you don’t want in your food.
- Do Not Submerge the Entire Unit: I can’t stress this enough. Unless your user manual explicitly states that a part is dishwasher safe, assume it is not. Water and electronics are not friends.
The Bigger Picture: Overall Deep Fryer Maintenance
Cleaning the heating element is a key part of a larger maintenance routine. A full breakdown on how to clean a deep fryer is a topic for another day, but remember to regularly clean the basket, lid, and exterior. Consistent care is what separates a fryer that lasts a year from one that’s still cranking out perfect onion rings a decade later.
Expert Take from Chef David Chen: “I always tell my students, you taste the history of the fryer. A clean heating element means pure heat transfer. That pure heat is what creates a perfect, non-greasy crust. If your element is dirty, you’re essentially re-frying old, burnt flavors into your beautiful, fresh food. Clean equipment is the first step to delicious food, period.”
Frequently Asked Questions (FAQ)
How often should I clean my deep fryer heating element?
For moderate home use (once or twice a month), a deep clean every 2-3 months is a good rule of thumb. If you use it more frequently or are frying heavily battered items, you should clean it after every 8-10 uses or whenever you change the oil.
Can I use a vinegar solution to clean the element?
Yes, for extremely stubborn grime. After soaking with soap and baking soda, you can create a paste of baking soda and a little water, apply it to the element, and then spray it with white vinegar. The fizzing action helps lift off the toughest spots. Just be sure to rinse thoroughly.
What’s the difference between cleaning a deep fryer and an air fryer element?
While both need cleaning, the process is very different. An air fryer vs deep fryer comparison shows that air fryers use a heating element and a fan, and cleaning usually involves wiping it down, as it’s not submerged in oil. A deep fryer element is immersed in oil, leading to a much tougher, baked-on residue that requires soaking and scrubbing.
My fried food tastes stale. Could the heating element be the cause?
Absolutely. A dirty heating element, along with old oil, is one of the primary culprits for “off” tasting fried food. The old, burnt particles on the element can impart a rancid or stale flavor into your new oil and, consequently, your food.
The gunk on my element is rock-hard. What should I do?
If a long soak doesn’t work, you can try the “boil” method. Fill the fryer with water (below the electrical connections), add a tablespoon of baking soda, and plug it in. Bring the water to a gentle boil for 5-10 minutes. This will often loosen the most stubborn, carbonized grease. Unplug the unit and let the water cool completely before draining and scrubbing.
A Clean Fryer is a Happy Fryer
Taking a little time to care for your deep fryer’s engine room—the heating element—pays off in a big way. You’ll get more efficient performance, safer operation, and most importantly, food that tastes fresh and delicious every single time. Now that you know how to clean a Deep Fryer heating element, you have the power to achieve that perfect, crispy, golden-brown goodness you’ve been dreaming of. Go on, give your fryer the spa day it deserves. Your taste buds will thank you.
One thought on “How to Clean Deep Fryer Heating Element: The Ultimate Guide”